Submit a Ticket My Tickets
Welcome
Login  Sign up

How to Navigate CAKE Reports

This article will cover:


Note:

For a video walkthrough of Reporting within CAKE, click here


How to Navigate the Stats Report


The stats pages, as are all reports - are defaulted to sort descending by revenue for the current day unless modified.


The Affiliate and Advertiser main tabs have an interface that allows you to go into different summary levels with various filters, accompanied by the pie-chart on the right-side. The actual report below reflects whatever selections are made in the upper interface.

  1. The stats page is always the top-most sub-tab in the left-hand navigation bar. It is located in the Affiliates, Advertisers, Lead Gen, and Reports main tabs.
  2. The left-hand section provides various drill-downs and filtering options including the ability to drill down ALL traffic by storefront, mobile technology (Device, Browser, OS, etc.), search term, and country or region, which isn't possible in your primary Reports tab.
  3. The pie-chart on the right and the report below will update to reflect the filters selected in the left-hand widget.


How to Navigate the Testing Report


The Affiliate and Advertiser main tabs also have another section where our most granular reports can be accessed - the Testing sub-tabs. 


Here you'll find 3 new sub-tabs:

  • Recent Test Clicks - this is the exact same report as the click report in the Reports tab, but it's pre-filtered to test clicks instead of the primary click report which isn't filtered.
  • Recent Test Conversions - this is similarly the exact same conversion report like that in the Reports tab, but it's pre-filtered to test conversions instead of all conversions.
  • Recent Lead Submissions - Now this is a report that doesn't exist anywhere else. Unlike the Leads b Affiliate and Leads by Buyer reports, this displays rejected leads as well because it simply shows the 30 most recent server and browser posts 
    • Browser posts on top and server posts on the bottom
    • It's a really great way to look for 'untracked' leads and trouble-shoot incoming post errors


How to Navigate the Reports Main Tab


Clicks/Conversions


Your click report will show you all clicks that were generated in your system.  Just like your master reports,  your click report can be exported into an excel file, and you can use custom views to customize your reporting view as this report has a great deal of information.     


Your conversion report will show you a list of every conversion that has tracked in your system.  From here, you can make some adjustments, such as marking leads as tests, returns, and editing prices.  


Because CPC and CPM conversions are not performance-based payments and thereby don’t represent consumer actions on an advertiser’s site/app like CPA/RevShare/Fixed do, we have a report filter that will hide CPC and CPM conversions counts by default, while still including their respective costs.


The Include CPC/CPM Conversions Filter gives a truer conversion count from a pixel fire/postback perspective in terms of actions versus Clicks or Impression counts. The Filter is disabled by default.


Enabling the Filter will impact these report columns:  Conversions, Paid, Total Paid, Pending, Rejected, Approved, Returned.


In the Reports tab, there are 4 primary sections:

  • Master Reports
  • Clicks/Conversions
  • Lead Detail
  • Quality


A final "Unsubscribes" tab will display if you're using the Optizmo integration.


How to Use Report Drill-Downs


Your Master Reports take all of your stats and gives you a high-level breakout by five different items:

  • Affiliate
  • Advertiser
  • Buyer
  • Offer
  • Campaign
  • Grouped Offers


One additional report - the Lead Status report - displays with the activation of the Lead Status feature (Lead Gen clients only).


You will also notice a set of icons to the left of the primary column (the column the master report is grouping stats by). Those icons allow you to drill down into more granular detail and as you click on a drill-down icon, CAKE will open another reporting tab to the right of the one you were on with even more new drill-down icons. You can open many of these reporting tabs without having to open a new window each time and closing one will simply take you to the previous tab. To see what an icon will show you, you can simply hover over the icon. Each master report has a slightly different set of default drill-downs, although most share a full list of available drill-downs in custom views.


Sorting


All columns in your master reports are sortable (either ascending or descending) but the reports are defaulted descending by revenue.  To sort a column, you can click on the column header which will sort ascending, or by clicking on the arrow and opening a menu-bar which allows you to sort ascending or sort descending as shown above.


Adding and hiding columns


You can also use the 'Columns' side-menu to hide columns from your immediate view. However, refreshing the report or page will default back to the original settings and columns. In order to save these preferences and reporting views, you must use a different feature called custom views.


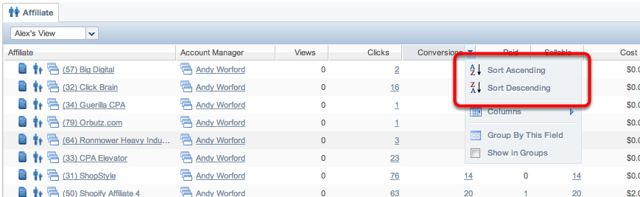
How to Customize a Report View


To make more permanent modifications to your reporting views, CAKE has a custom views feature available in nearly all reports and grids. 


To use custom views, click on the 'Edit View' icon in the top right of your report - This will open a new window with three sections.


Section 1: Filters

  • The left-most section is to add, remove and set values for reporting filters.
  • To add filter options, check the box to the right of the filter.
  • To remove a filter, uncheck the box to the right of the filter.
  • To set and save a value, select a value in the drop-down or type-in a value as required.

Section 2: Drill Down Report

  • The middle section allows you to add drill-downs into your reports.
  • To add more drill-downs, check the box to the right of the drill-down and a corresponding icon will appear in your report.
  • To remove drill-downs, uncheck the box to the right of the drill-down and the corresponding icon will disappear from your report.
  • You can re-order these icons as well by using the 3 line-icon to the left of the drill-down.

Section 3: Columns

  • The right-most section is to add, remove, rename and re-order columns.
  • To add columns, check the box to the right of the column and the corresponding column will appear in your report.
  • To remove columns, uncheck the box to the right of the column and the corresponding column will disappear from your report.
  • To rename a column, double-click on the name and you can type in a new name (this is especially helpful when the name is long and your viewing space is limited)
  • You can re-order these columns as well by using the 3 line-icon to the left of the drill-down.


To create and save your custom view, click 'Create New View'. We suggest keeping the default view as this is shared across all users with access to that report. CAKE doesn't restrict the number of additional views created, and every user has the ability to save a default just for them. Once you create a new view, you'll be given some options to 1) name your new view, 2) make this new view be the default view for you when you open up this particular report, 3) sharing this view with other employees and 4) whether to export all fields or just those you've selected in your view when exporting. Once you've completed those steps, click Save and a new drop-down will appear on the left-hand side of the report with available views.


How to Adjust Conversions from Reports


To mark a conversion as a test, simply right click on the line item from the conversion report, and choose 'Mark as Test'. Highlighting more than 1 row will make a bulk edit where all selected conversions will receive the same adjustments. Marking a conversion as a test will change the indicator under the 'Test' column to a green dot and change the price received and price paid to $0.


To change prices of your conversions, right-click on the line item you'd like to change, and select 'Change Price'.  A new window will open, giving you the opportunity to change the price paid and price received with the option of adding notes.  All notes can be displayed in your conversion report under the notes column.


Did you find it helpful? Yes No

Send feedback
Sorry we couldn't be helpful. Help us improve this article with your feedback.